How to use Notion to easily manage your blog
8 June, 2023
In this first post, we will talk about how to easily manage our blog with the help of Notion. We will achieve this integration with the tool using a couple of npm packages called notion-client and react-notion-x.
With just a few lines of code, we can see how to fetch our information from Notion and how quickly it synchronizes with each change.
Configure your database
First, we will need to create a database to store our posts. This page will be the place from which we will manage all the content we want to publish and use.
Parameters and Values
For my personal case, the properties assigned to each blog post have been the following:
- Title
- Description
- Slug
- Featured
- Is Public
- Date Published
- Categories
- Author
- Tweet
Since these properties can be completely customizable, it is recommended to start with a few properties and add more as you become familiar with handling the data correctly.
Below is an example of how the database or page we would use could look like:

Obtain your public link
Once the fields from which we will extract information are determined, we will need to publish the page in order to be able to read them in a simple and efficient manner.
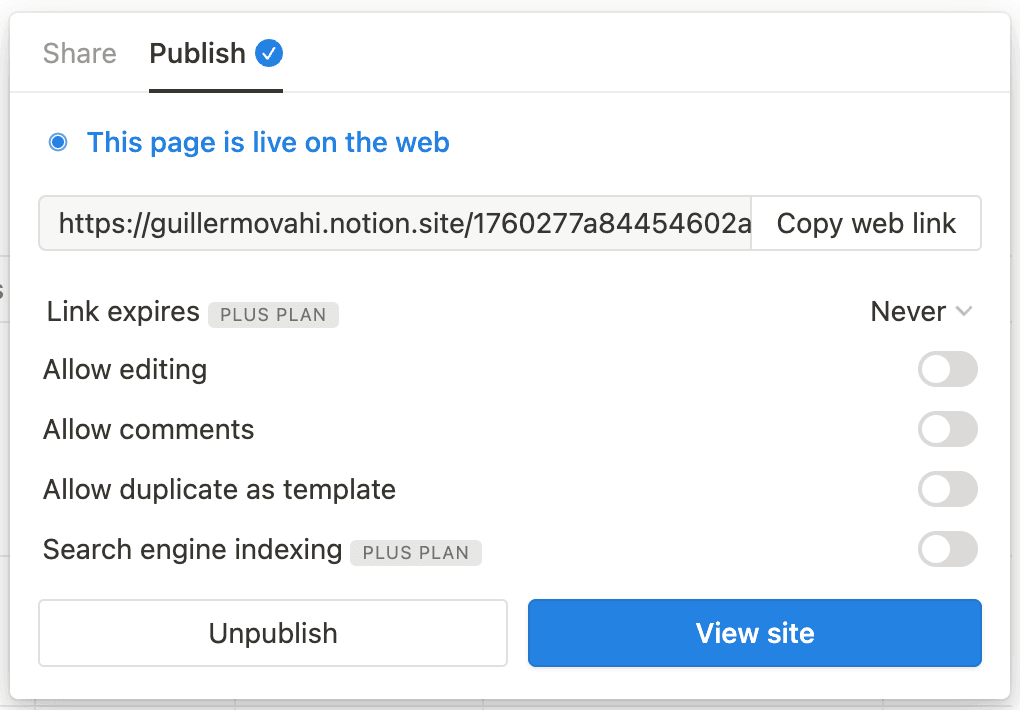
Get your identifier
Once published, we will obtain a URL from which we will need its identifier. Something similar to this:
https://YOUR_USER.notion.site/YOUR_IDENTIFIER?v=2edb744b7e6861b8b55c781bcb47be58&pvs=4
Scrape data with node.js
Get all info from page
In my particular case:
The output of this code will return a JSON with all the information that the Notion client is able to extract from the page:
Blog properties filtering
At this point, we must filter the data to keep what interests us:
To determine the values of each column in our database, we will use the previously attached code. The value of schema will give us each of these elements, as well as the information they contain, such as the type of element within Notion they are, or the options they have (for multiple select elements).
As we can see, the data model can be somewhat understood, but there is a layer of abstraction to each field that makes it difficult to work with this data. To address this, we can create a kind of *dictionary* to properly locate or map these properties when we need to work with them (we will see why it is necessary to keep those identifiers that the Notion client returns).
In this simple way, we will obtain the data in a clearer manner:
For the value of the variable blogProperty, the words have been converted to lowercase and any spaces have been replaced with underscores ('_'). This step is optional, but it facilitates the handling of data in JSON-like structures
Blog posts assignation
Below you can see the code necessary to process the previously scraped data and how it will be classified. As you can see, by iterating through a `for each` loop on the keys of the previously extracted Object `block`, we will be able to classify them as desired.
In my particular case, this information is classified and subsequently returned by a function that aggregates all the blog posts, along with their properties, into an array. To make an even more thorough filter, only posts of type page and with the is_public property set to true will be returned.
The output that this script will return will be something like this:
This information will be retrieved through the frontend of our website and used via React props.
A simple example using some of the extracted fields for the home page of a blog could be as follows:
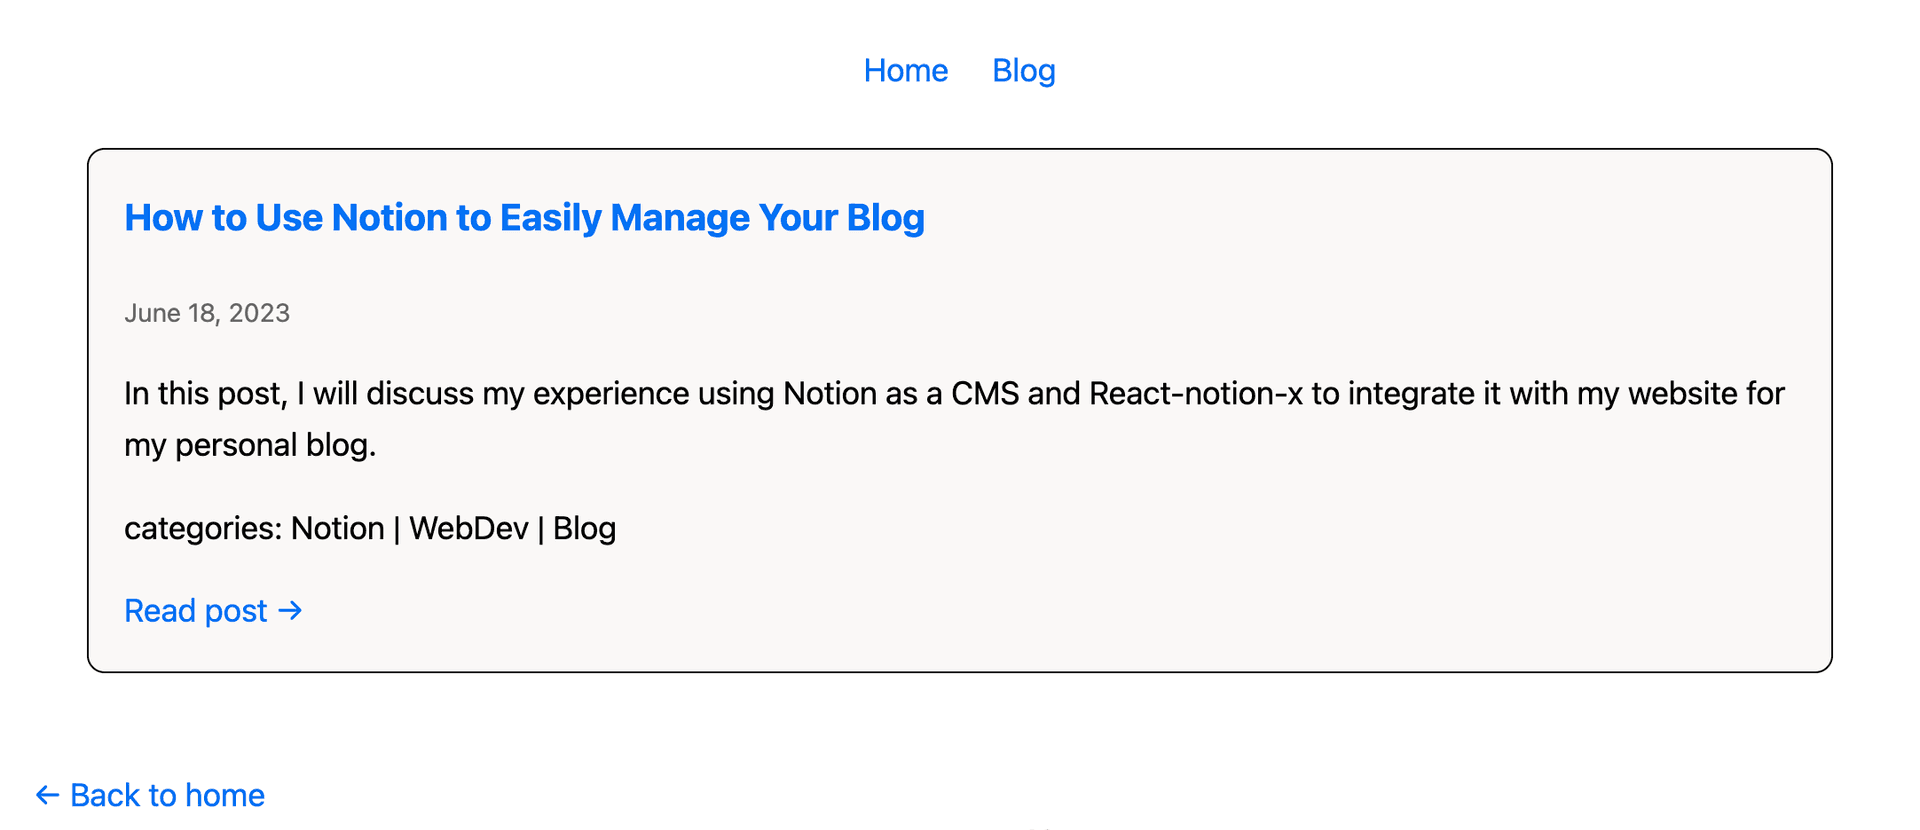
Render content on Page
All the information we have seen so far, which is essentially the management part of the blog-related information, can be considered the CMS (Content Management System). But where is the actual content of the blogs we have written?
This part is relatively simple but has several customizable points, which we will discuss in more detail.
As seen in the code snippet, we are using the react-notion-x package, which allows us to easily and efficiently render the content of Notion pages.
But what is recordMap
This variable is essentially the "parent" identifier of a page, which allows us to retrieve all the information of that page. Since the "information" consists of nested blocks, this tool is very useful as it saves us the task of styling and formatting the content according to our page.
The identifier corresponds to what we previously stored as post.id within the allPost array. Therefore, we can retrieve the recordMap as follows
To configure this tool provided by the react-notion-x package, you can simply include `recordMap=recordMap` and you will have a version that closely resembles the original Notion page. If you desire a more customized solution, you can explore the available options of the tool, such as darkMode, fullPage, or disableHeader.
In the case where our posts require code snippets, as shown previously, it is necessary to add the components prop, specifically the Code part. We can extract this Code as follows:
Since everything is completely customizable, it is highly recommended to read and understand the official documentation of react-notion-x, as well as the introductory projects proposed by the creator.
Reference
https://github.com/NotionX/react-notion-x
https://github.com/transitive-bullshit/nextjs-notion-starter-kit